The MSI MEG X399 Creation Motherboard Review: The New 16-Phase Shark In Town
by Gavin Bonshor on August 13, 2018 8:59 AM EST- Posted in
- Motherboards
- Gaming
- AMD
- MSI
- Overclocking
- ThreadRipper
- X399
- TR4
- Threadripper 2
BIOS
MSI so far has retained the same BIOS UI throughout all of their Zen architecture motherboards, including the more entry-level B350 and B450 chipsets, as well as the more feature-rich X370 and X470 chipsets. It’s good to know that MSI follow a consistent pattern in regards to their UEFI BIOS, as their X399 chipset offerings carry the same UEFI layout which they call Click BIOS 5. The general layout consists of a black background with reddened highlighting, with white text to help to make the contrast work visually. Like all of MSI’s Click BIOS 5 equipped motherboards, pressing F7 on the initial splash screen switches to the more advanced mode, where more experienced users can find a variety of settings for overclocking, enabling and disabling certain features, and tweaking the AMD-based power properties.
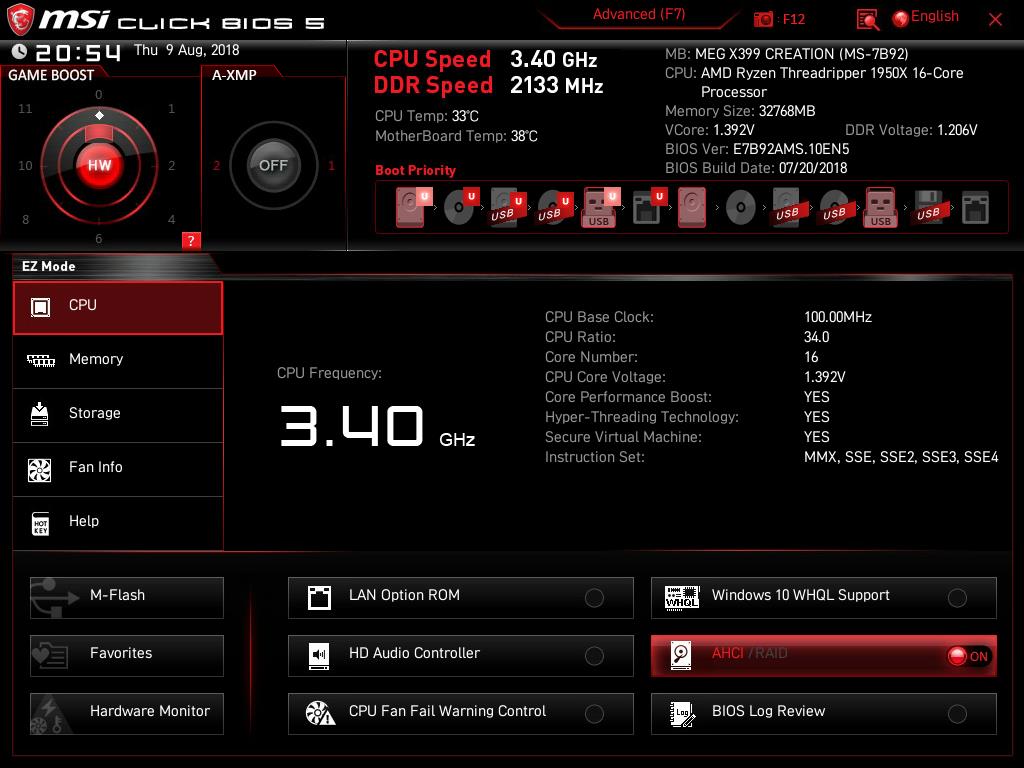
Entering the BIOS during post can be accomplished by pressing the F2 or Del key during POST, which in turn brings up the initial splash screen, which MSI called EZ mode. This screen provides a basic overlay and provides plenty of informative details throughout the different panels, including information on the installed processor, memory, and storage. It also allows users to set custom fan profiles with control for each of the ten 4-pin headers dotted around the board. The top part of the panel remains the same throughout the BIOS and allows users to enable and set different stages of Game Boost; this is a bank of pre-defined overclocking profiles with each different processor having different features, dependent on what MSI deem appropriate settings-wise. The top panel also has a clickable A-XMP button which can enable or disable the RAMs X.M.P memory profile without having to deep dive into the advanced section of the BIOS.
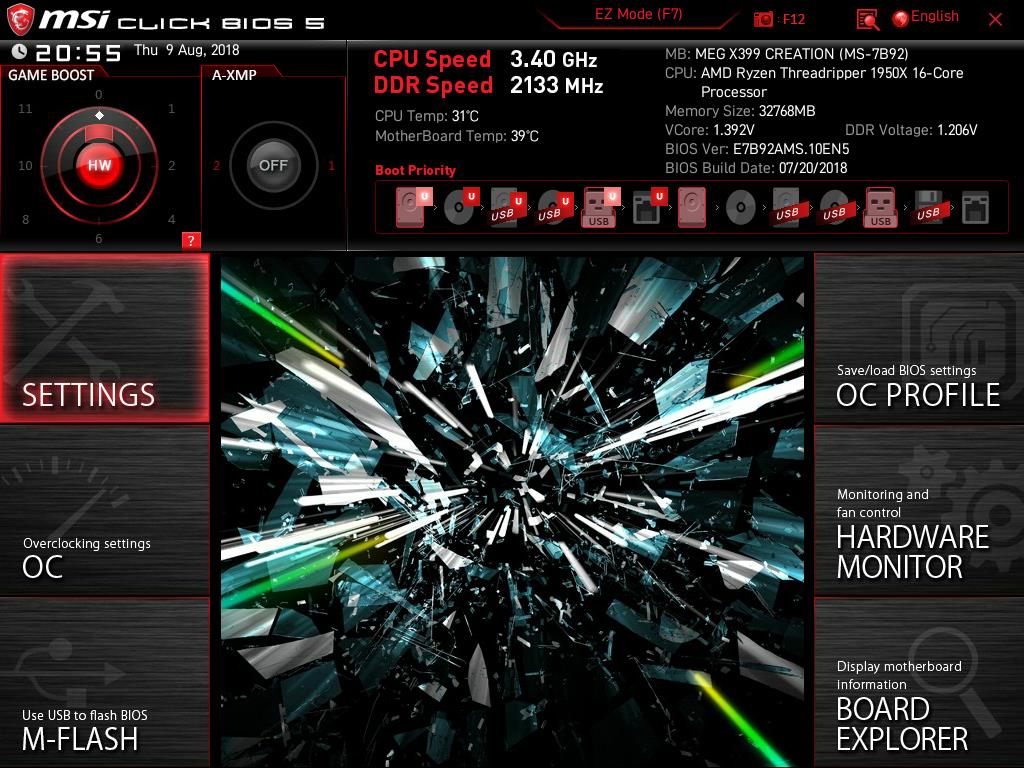
Pressing F7 grants access to the advanced mode, which opens up an overabundance of customizable options. This includes all those overclocking settings through the OC section, easy access to the M-Flash firmware updater, quick access to any custom overclocking profiles, as well as a hardware monitor and the board explorer. The center of this version of the Click BIOS 5 is tailored to the Creation with a big bang-styled futuristic explosion in the center; very similar in design to the rear panel cover on the board itself.
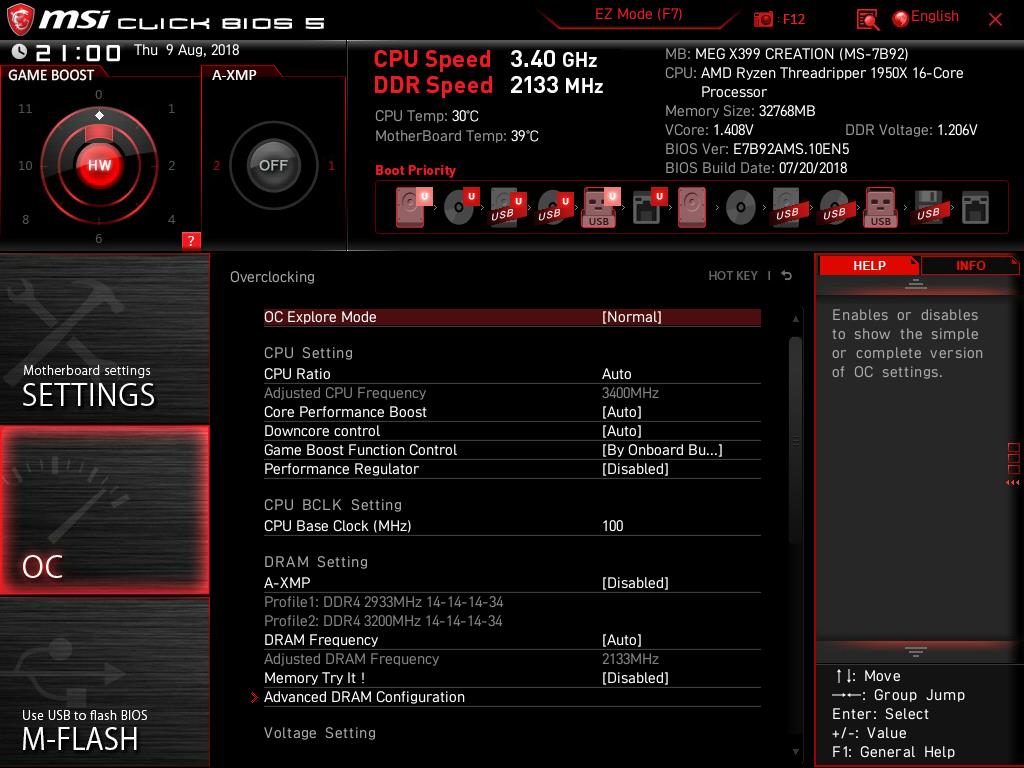
With a nineteen-phase power delivery, users might be tempted to stretch the silicon in their system, and I personally would probably visit the OC panel first. As expected, the OC settings section allows users to overclock the CPU and memory. While MSI do include the Game Boost button (on the PCB and within the BIOS), usually vendors tend to pump too much voltage throughout the CPU, which might be fine from a stability point of view, but in other aspects it can be quite troublesome, especially if an adequate cooling solution isn’t used.
Options here include CPU core frequency tweaking through a CPU multiplier ratio, in increments of 100 MHz, as well as through base clock overclocking. For the latter the X399 Creation does house an external clock generator, something sub-zero overclockers will be happy about. All the usual suspects in terms of voltages are present such as core voltage, memory voltage and more obscure voltages such as VDDP. Users can also adjust memory latency timings with these settings being found in the advanced DRAM configuration sub menu.
The Performance Regular setting allows users to enable profile-based tweaks for certain benchmarks such as Cinebench R15, which in the real world is pointless but from an overclockers perspective, it could be handy and provide a slight advantage over someone not using this feature.
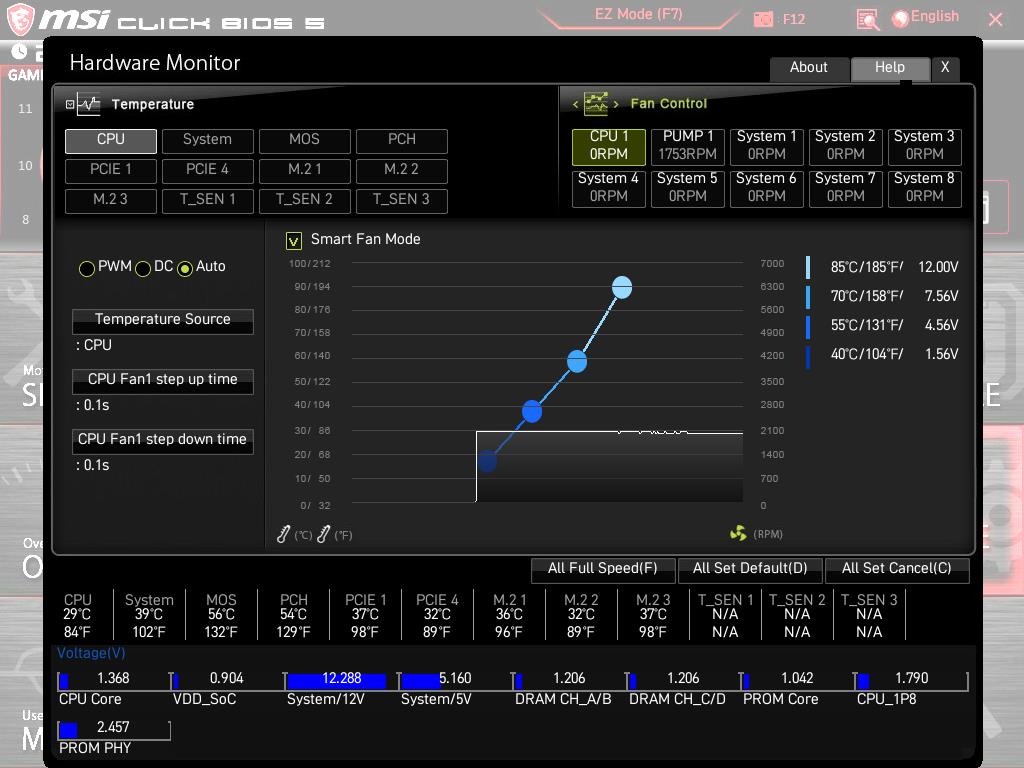
The hardware monitor section is one we’ve seen numerous times before and is one of the better implemented ones from motherboard vendors. The ability to set individual fan curve profiles based on temperature is done well, especially given there are ten 4-pin headers to control. Of course, the options are there to enable every header to operate at maximum speed and basic temperature monitoring with voltage monitoring is also available for viewing towards the bottom of the screen.
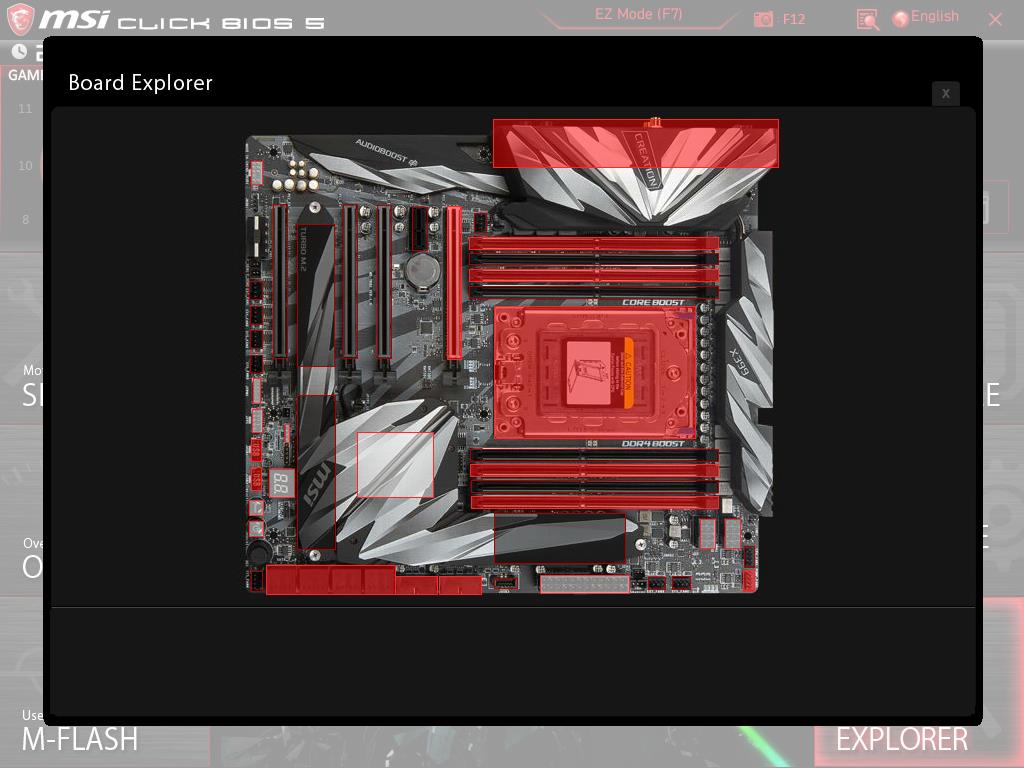
Just as with the hardware monitor, another welcomed feature is present on X399 via the board explorer. Given that the MEG X399 Creation has a lot of USB connectivity, eight RAM slots, and four full-length PCIe 3.0 x16 lanes, the board explorer allows users to see a bird’s eye view of their motherboard, with each installed component being highlighted up in red. Click on the rear panel cover on the board explorer brings up the rear IO and as is with the main area, highlights each populated port up in red.
_thumb.jpg)
_thumb.jpg)
_thumb.jpg)
_thumb.jpg)
_thumb.jpg)
_thumb.jpg)
The MSI Click BIOS 5 UEFI BIOS works well and does so in a visually pleasing manner. The GUI is responsive and intuitive and the help section is one of the best from all of the available motherboard vendors. There are plenty of options to tweak and overclocking is made easy through the OC section. One very neglected area of the BIOS is the lack of RGB control options, even though I’m generally highly critical of vendors who use primitive means of RGB customization within the BIOS, at least they attempt to include some controls whereas MSI has included none within. Users looking to make use and set their own RGB LED profiles will need to do so by installing the MSI Mystic Light software via the provided CD, or download the latest version directly from the support section on the MSI MEG X399 Product page.
Software
Just like in our previous reviews of MSI motherboards, it's no secret that there's oodles of software to choose from. Software such as the MSI Mystic Light utility offer customization of the onboard and extended RGB capabilities of the board, as well as others like the MSI Command Center which allows users to overclock their system without having to enter the BIOS. Just like on MSI's Gaming branded range of motherboards, most of the included software is specifically aimed at gamers with MSI's RAMDISK being one of the only utilities somewhat aimed towards content creators and enthusiasts.

The MSI Command Center utility provides a variety of informative monitoring abilities as well as allowing users to overclock their system within Windows. The CPU frequency option enables users to either click and drag the interactive slider up to the desired core clock speed, or it can be done incrementally in steps of 25 MHz via the + and - buttons just below. Just like the CPU, memory can also be overclocked and while there are no options to increase or alter the memory straps, overclocking can be done by adjusting the base clock. The Command Center app does inhibit the ability to directly change memory voltages, and instead users can select through the different Game Boost profiles and enable them this way. The MSI Command Center app also includes a hardware monitor similar to what's inside the BIOS and has a slightly less intimidating fan profile selection tool.
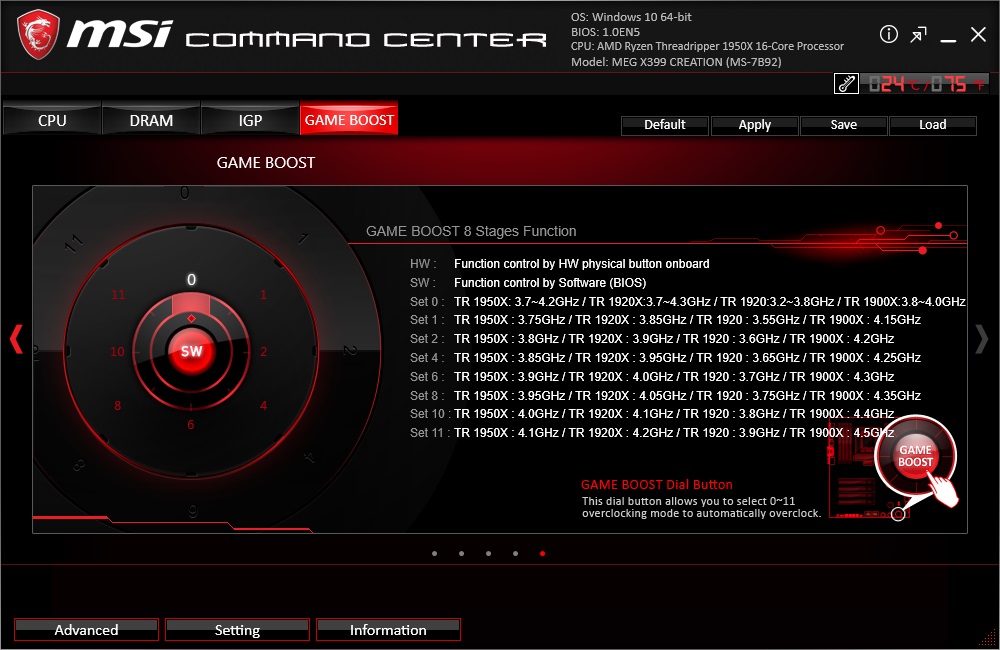
The Game Boost section is actually quite detailed and gives users information on what each setting applies, so setting stage 4 would apply a Ryzen Threadripper 1950X with a core ratio of 3.85 GHz. The software also highlighted what the settings would be on other relevant processors such as the Threadripper 1920X and the lower spec Threadripper 1920 and 1900X.
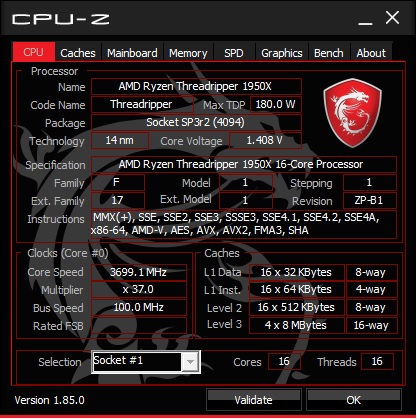
A custom MSI Gaming themed CPU-Z skin is available to download, or via the installation CD (though it's always recommended once online to update to the latest version). CPU-Z is a monitoring utility created by CPUID and allows users the ability to monitor CPU core voltage, CPU frequency as well as the set multiplier, base clock (bus) speed, and other CPU and memory relevant settings such as CAS latency timings and memory frequency.
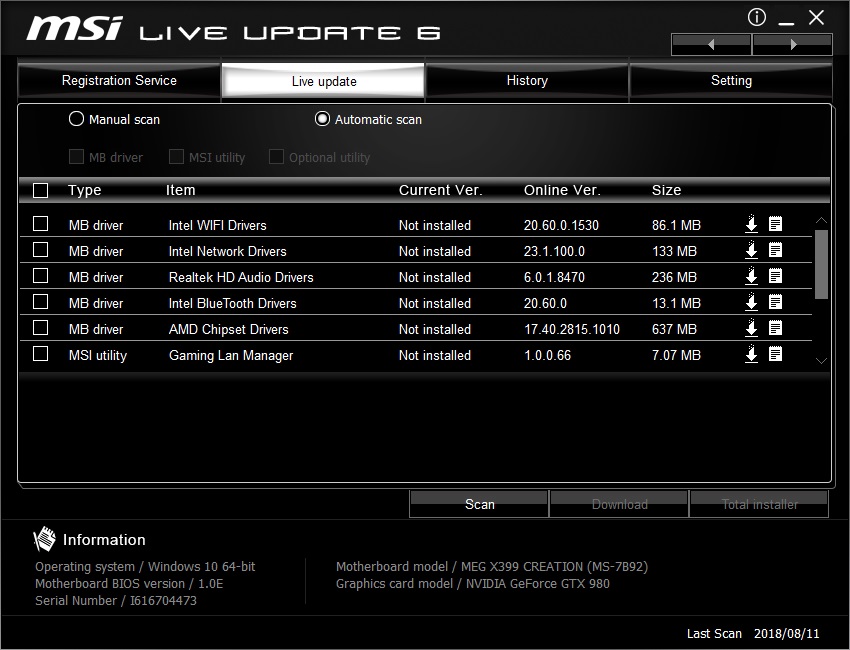
MSI's Live Update 6 software can be quite useful for updating motherboard drivers and software to the latest versions. Users can download with the intention to install manually or use the total installer button which downloads the software and installs it automatically saving time. There are options to scan for software automatically or manually if there's a certain app or utility that's required, although a full list of supported utilities can be installed directly from the installation CD, or via the product page from the MSI website.
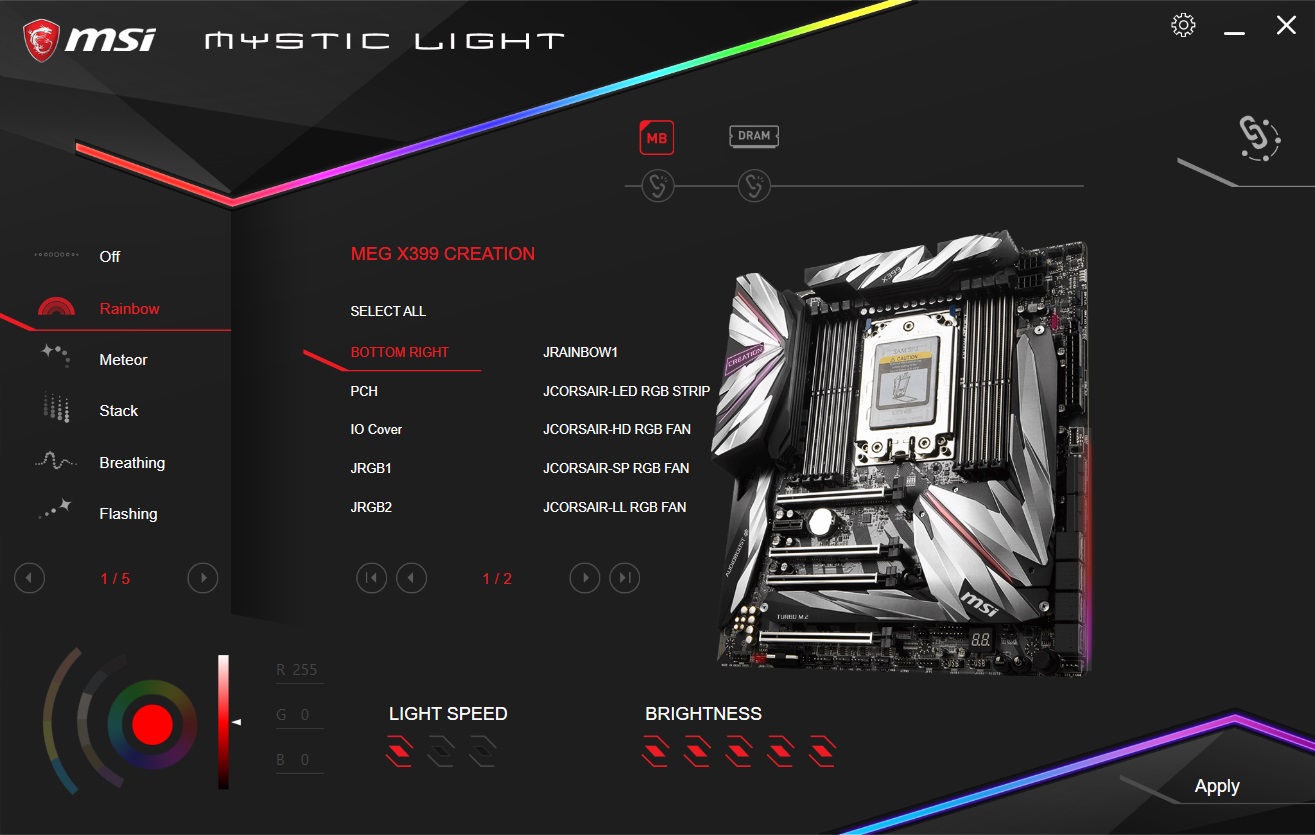
As it stands, the MSI Click BIOS 5 UEFI firmware has no options for adjusting and customizing the built-in RGB LEDs. With that being said, the MSI Mystic Light utility gives loads of options and lighting effects to select from. The lighting effects on display represent one of the most comprehensive selections of RGB options available from software I have seen thus far with rainbow, meteor and lightning being my particular favorites. Users can adjust the lighting effect speed, the LED brightness and sync up compatible hardware to operate with a uniformed and clean look. If a user wishes to do so, they can individually set each section of LEDs and header to the desired color.
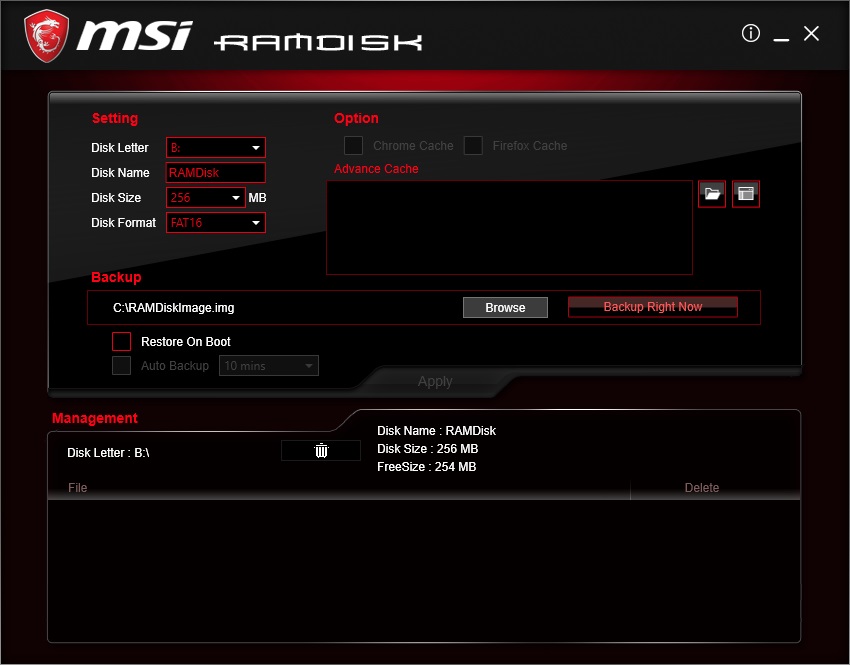
The MSI RAMdisk software affords users the ability with high capacity DDR4 to create a virtual RAM drive. The storage capabilities of a RAMdisk far surpass the transfer speed and seek time of conventional hard drives. Unlike the storage of a hard drive or SSD, RAMdisk is only temporary and can be reduced, increased or removed completely at the click of a button. Any data stored within the RAM will be lost forever once deleted, just as if a regular storage drive were to be formatted.
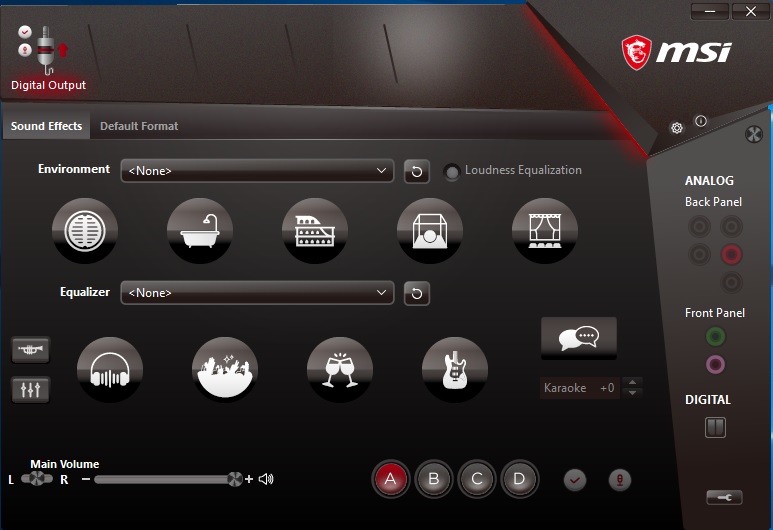
With the MSI MEG X399 Creation utilizing a Realtek ALC1220 audio codec – and with the board having a premium theme given the $500 pricing – MSI has included a custom MSI skinned version of the Realtek Audio Manager utility, which looks far nicer in design and feels more responsive. Included are options to add environment-based effects such as stone room, auditorium, and padded cell (ed: all but necessary for hardware reviewers), as well as different equalizer profiles for various genres of music such as pop, rock and even more vocal focused tracks. Clicking the equalizer button brings up ten different sliders which allow for custom settings to be used, with decibel control available for lower, mid and higher frequencies ranging from 31 Hz to 16 K.


As previously mentioned, the majority of the software included with the X399 Creation is primarily gaming focused, and with this board being aimed towards content creators and consumer level workstation users, the board does represent a high-end option that could be a powerful foundation for a powerful gaming system, or an indomitable video rendering machine.


17 Comments
View All Comments
Chaitanya - Monday, August 13, 2018 - link
Even on high end there are no proper heatsinks for vrms its that silly solid chunks of aluminium with minimal fin stack that dominates. It was refreshing to see Gigabyte go back to old school finned heatsinks for their X470 board.Questor - Monday, August 13, 2018 - link
Flash over substance. It's a pitiful way to make a product.Oxford Guy - Wednesday, August 15, 2018 - link
Not to mention it looks worse than aluminum or copper fins.Oxford Guy - Wednesday, August 15, 2018 - link
ASUS and Gigabyte released VRM coolers back in 2013 that would be used with water systems as well as air (hybrids). This was for quad core non-prosumer CPUs, too. But, we have certainly progressed as an industry. Now, we can have really cool paint and LEDs instead of efficient VRM cooling.Questor - Monday, August 13, 2018 - link
Hopefully Buildzoid will get a hold of this model motherboard and verify it is what MSI says it is. I'm so tired of marketing lying about computer components, I don't believe much of what I read from the makers. Thus I am in "prove it" mode. Unfortunately, most reviewers either don't look or don't know what they see if they do.Ian Cutress - Monday, August 13, 2018 - link
This is one of the reasons we have our power delivery component table in our reviews now. Gavin knows what he's talking about - he did a good deconstruction of the B450 boards that exhibit the behaviour you are describing.https://www.anandtech.com/show/13085/the-asrock-b4...
Gothmoth - Monday, August 13, 2018 - link
it´s an 8 phase. as 2 "phases" are always in phase and therfore can not count as two seperate phases.one is marekting the other is reality.
diehardmacfan - Monday, August 13, 2018 - link
mmm no this looks like an actual 16 phase, just a "dumb" 16 phase because of the doublers.the cooling looks pretty crappy though.
KateH - Sunday, August 19, 2018 - link
i looked up the datasheet for the doublers mentioned and it describes them as outputting 2 PWM signals 180* apart so functionally its rectifying 16 phases, but the regulator sees 8.KateH - Sunday, August 19, 2018 - link
the datasheet if anyone is interested:https://www.infineon.com/dgdl/ir3599.pdf?fileId=55...
neat trick, and according to the sheet the doublers can also function as quadruplers so if one wanted 32 phases for some insane reason they could do that with the 8-channel controllers