ASUS Maximus V Formula Z77 ROG Review
by Ian Cutress on March 25, 2013 2:30 PM EST- Posted in
- Motherboards
- Asus
- ROG
- Z77
ASUS Maximus V Formula BIOS
The most important feature in a BIOS design is responsiveness – if an option does not change immediately, or the user has to wait around, no-one is going to like it regardless of what options you put in. This is unfortunately a poignant truth; discussing with manufacturers about why certain features are not implemented in modern graphical BIOSes brings up the issue of responsiveness - if it will not respond quickly, it cannot go in. So while it might be nice to have an OS-like or Android-like BIOS system that is highly interactive, it might not work as fast as you would like. Surely this should not be an issue – we are dealing with systems built around the latest super fast CPUs, so why should choosing an option in the BIOS be slow? This is all down to the rather legacy way we still deal with the BIOS along with the boot services and old start up POST sequence. The UEFI 2.1 standard does not actually define a user interface, but rather the Human Interface Infrastructure (HII). When reading the HII spec, it makes designing a UEFI sound boring - as simply a list of forms and verbose markup languages alongside static images, which is not ideal if you have to fit everything into a 64 Mbit package and make it look amazing. It makes me wonder how exactly MSI put those games into the early P67 BIOSes.
ASUS tell me they have tested many different ways on how to represent their data. Of course one design does not please everyone perfectly, and it is hard to add in everything that everyone would like due to the human interaction factor, and the need for everything to work in an instant. As a result, what you see is what you get – a form based interface with static images, but at least it looks better than most! ASUS also like to keep options neat and tidy, offering the extreme enthusiasts the ability to tinker, as well as improving compatibility with different types of memory, RAID card et al.
Being an ROG board, first entry into the BIOS is usually to advanced mode, but stepping back out a bit brings us the ROG version of EZ Mode:
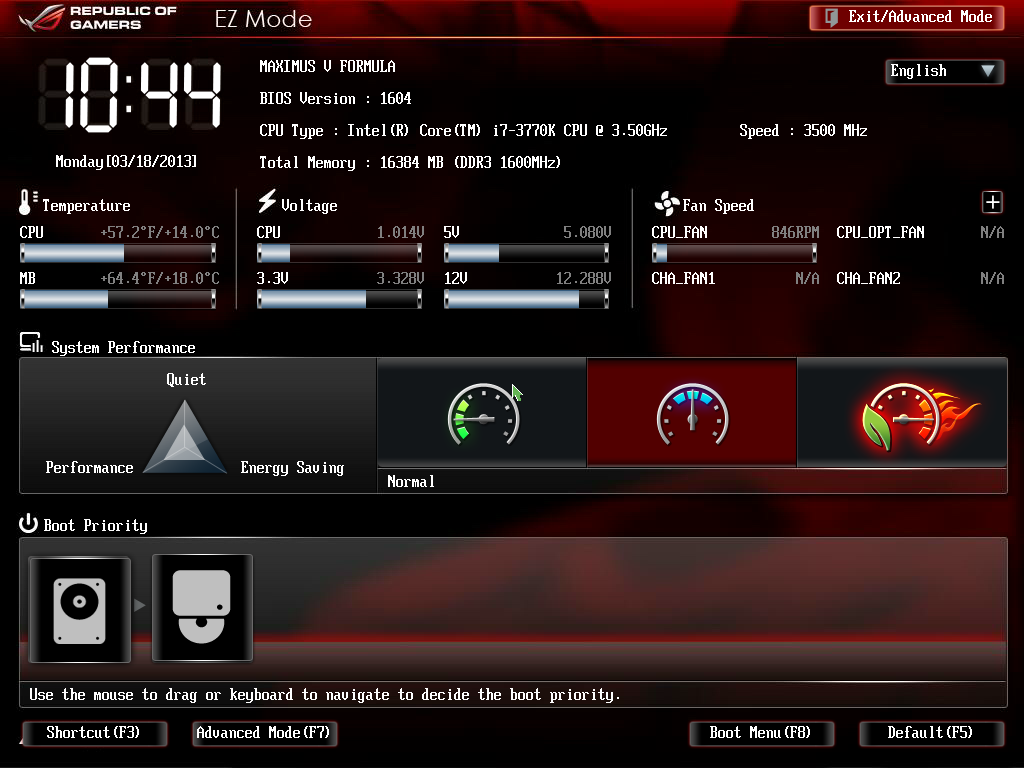
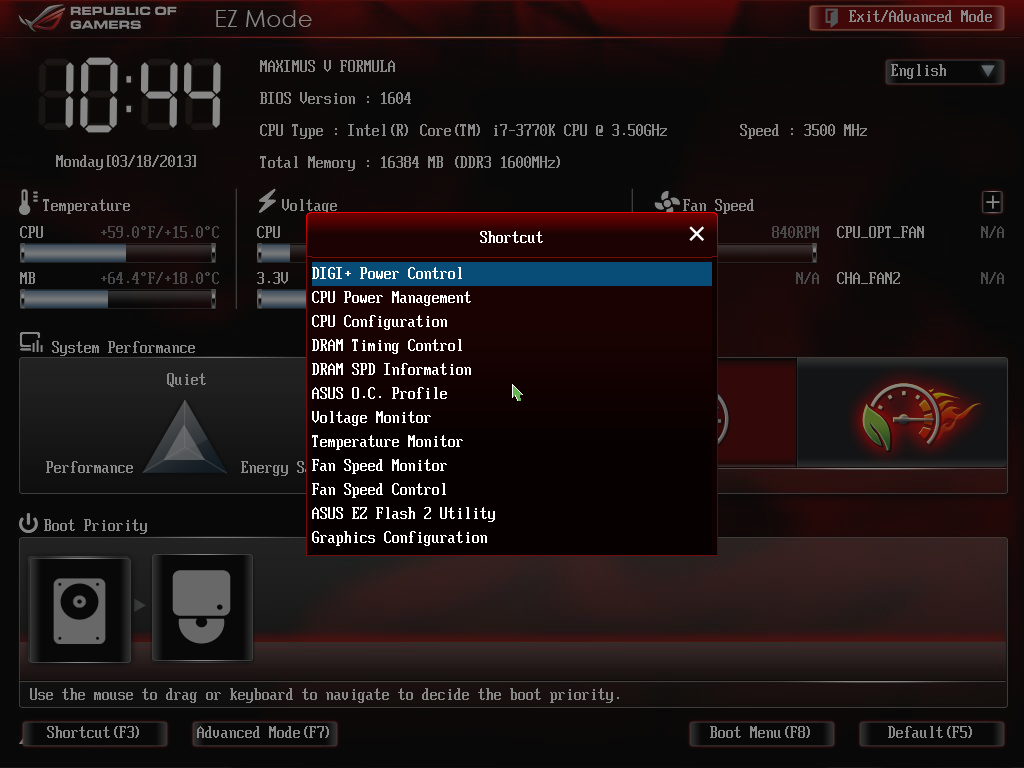
The ROG version is essentially a red themed ASUS BIOS, with different text colors, ROG icons, and a red styled background. We get the important info in EZ mode, such as motherboard in use, BIOS version, CPU name and speed, Memory amount and speed, temperatures, voltages, fan speeds and boot priority. ASUS adds in a trio of buttons for system performance – from left to right we have energy saving, normal, or performance. Along the bottom are a series of quick menus, such as shortcuts to areas of advanced mode and straight to the boot menu. In order to change language, the option is on the top right, although a button on the bottom would also be preferable.
Moving into the Advanced Mode we come across Extreme Tweaker, also known as the ASUS overclocking options. Almost similar to what we saw in the ASRock Z77 OC Formula, albeit a lot more varied – in order we have the automatic OC options, CPU and memory options, sub menus for DRAM timings and DIGI Power Control, voltage options and finally skew options.
If you cast your mind back to the BIOS of the ASUS ROG X79 Rampage IV Extreme, we had overclock profiles that catered for different mind sets – the gamer, the overclocker, and the extreme overclocker. The MVF is a little more reserved here, offering a single “Gamers’ OC Profile” and three/four different options via CPU Level Up when you power the system out of the box. The Gamers’ OC Profile gives a staggered multiplier overclock across core loading (48/47/46/45), whereas the CPU Level Up options go for a fixed speed overclock (4.6 GHz, 4.4 GHz, 4.2 GHz) – though neither of them deal with memory.

Manual overclockers can set the AI Overclock Tuner option to ‘Manual’ or ‘XMP’, which gives the user access to adjusting the CPU BCLK and multiplier frequencies on both a per-core and all-core basis. There are additional options for various benchmarking improvements (Xtreme Tweaking/SPI Booster), but all voltage and power options must be performed further down the list.
Underneath the memory selection are a set of four options – DRAM Timing Control, GPU.DIMM Post, CPU Power Management and DIGI Power Control. The first gives the user access to the subtimings for the memory:
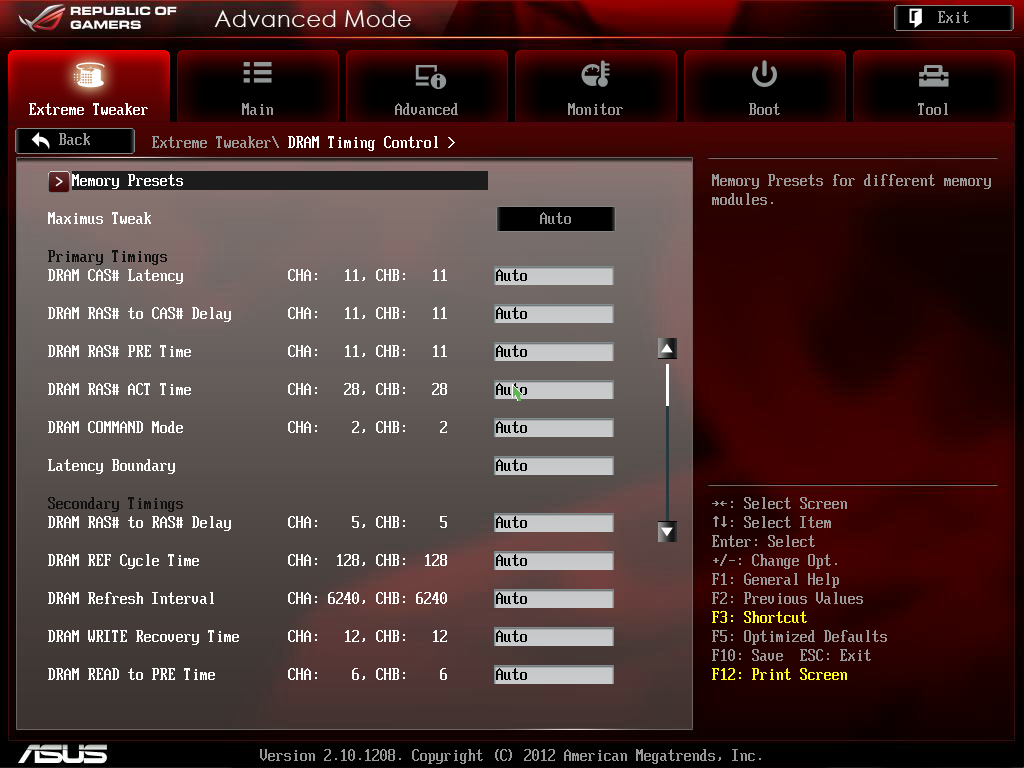
There is also a submenu for ASUS recommended sub-timings if you happen to own particular high end memory kits:

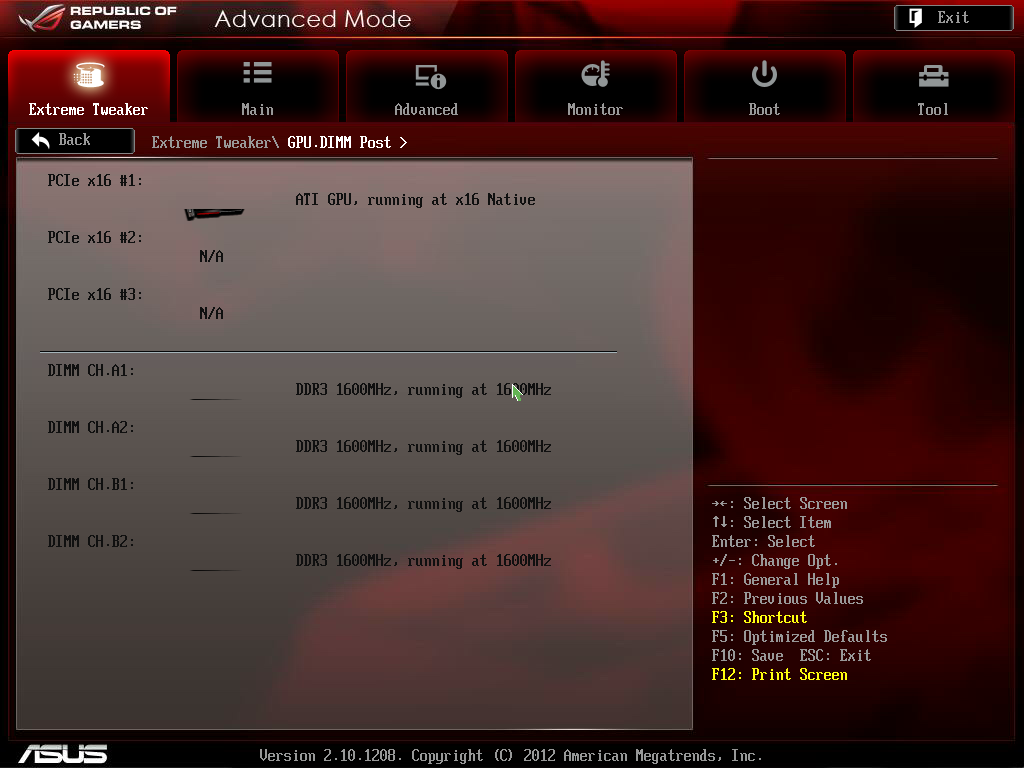
The GPU.DIMM submenu in Extreme Tweaker is a useful feature to determine what GPUs and memory the system actually recognizes at POST. Thus if a memory stick has failed, or a GPU is running at the wrong lane allocation, it can all be checked here without fiddling around for a couple of hours determining what is wrong.
The CPU Power Management submenu offers options to enable/disable SpeedStep and Turbo Mode, and the DIGI Power Control contains our regular array of ASUS options for Load Line Calibrations, Phase Control, Current Capabilities and Voltage Frequencies, for CPU, DRAM and VRM options.

Users have access to the ROG forums for extended guides on overclocking the MVF – we will cover our basic overclocking strategy later in the review.
Aside from overclocking, we have our usual array of BIOS options for controller and component settings. In the Advanced menu there is access to SATA configurations (for RAID or IDE, AHCI by default), Intel RST, Intel SRT, iGPU configuration, forced PCIe lane speed settings, USB configurations, Controller (USB 3.0/SATA 6 Gbps/WiFi/BT/LAN/Audio) settings and LED control. The last one is particularly useful if the onboard lights are a distraction in the evenings.

The BIOS also offers the wide array of monitoring menus, for voltages, temperatures (both included and optional sensors) and fan speeds. The fan control settings are in the Monitor -> Fan Speed Control menu:
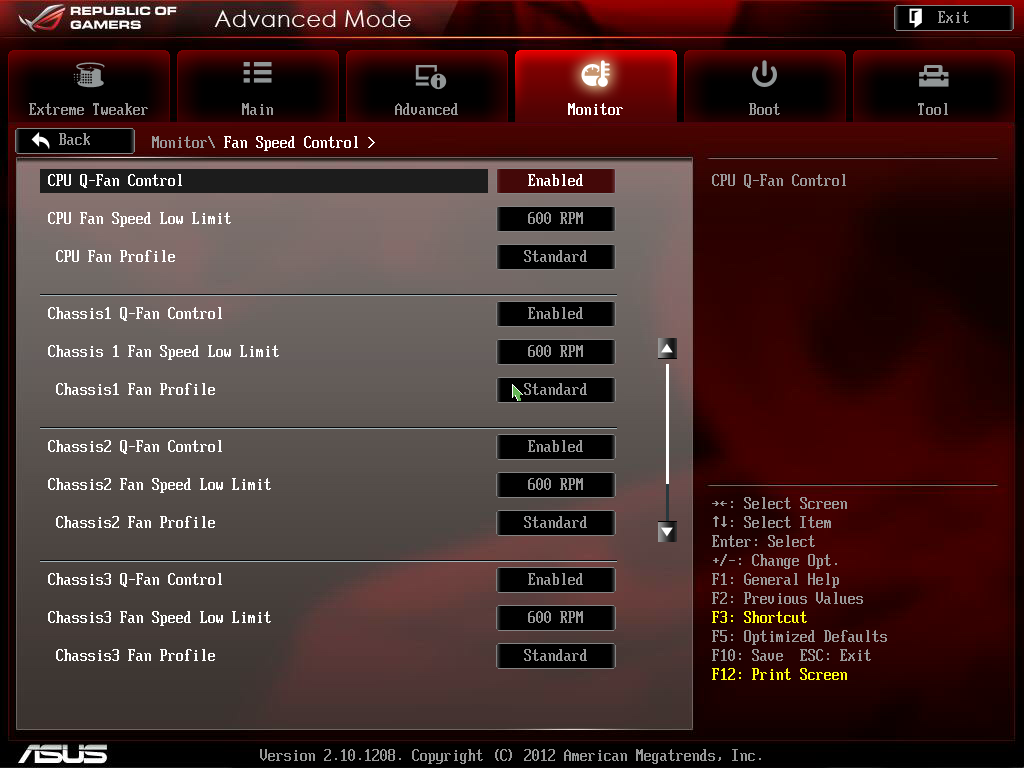
The fan controls in the BIOS are better than fan controls on most motherboards overall, however the ASUS package offers better fan control in the software package. More on that in the software section of this review.
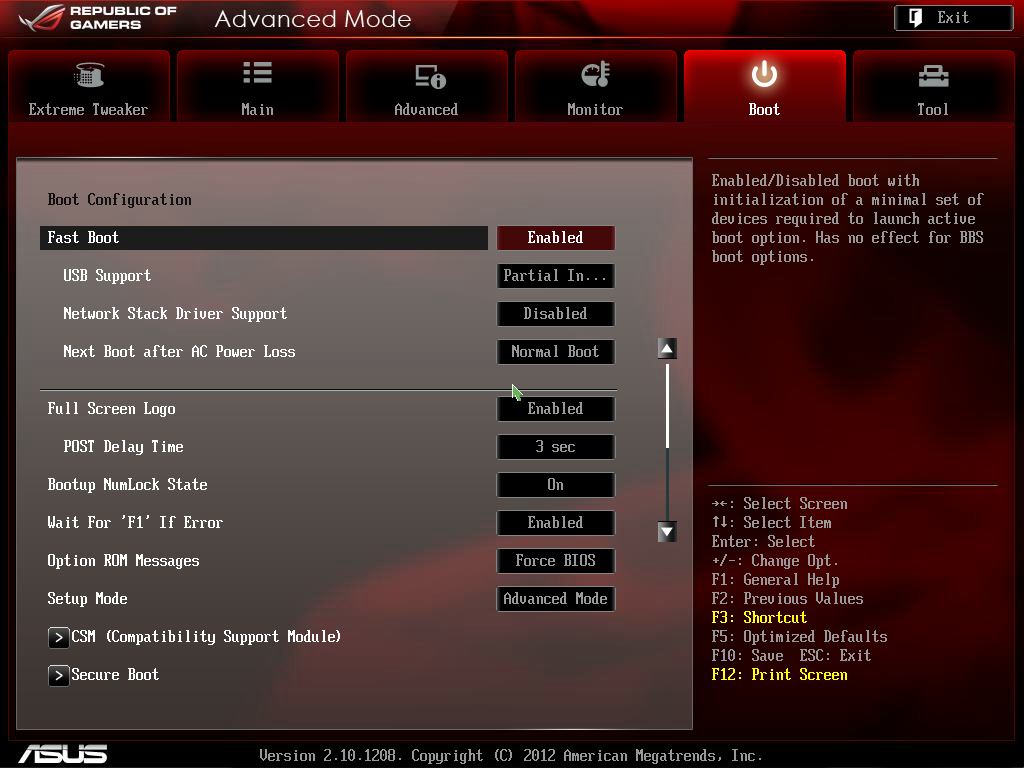
The Boot menu of the BIOS offers fast boot options, as well as boot order changes. As ASUS has migrated to the CAP BIOS system, this should allow the motherboard to take full advantage of the fast booting options that Windows 8 offers, along with compatible hardware. Fast booting into Windows 8 is great for those that use it.
The MVF BIOS also offers an EZ Flash Tool to update the BIOS, a series of OC Profiles to enable enthusiasts to save settings, a Go Button file to enable a one push overclock, and an SPD information tool.


Overall, the ASUS BIOS is well laid out and offers a wide variety of functionality. In direct comparison to the ASRock Z77 OC Formula BIOS, I would give the nod on looks to the ASRock. The ASRock offers a nice background (subjectively speaking), more detailed icons, more Auto-OC options, a few little quirky tools and more content on the screen due to the smaller font size. The ASUS in contrast caters well for the overclocker wanting to push the boundaries with the wide variety of options.


38 Comments
View All Comments
DanNeely - Monday, March 25, 2013 - link
Are the 3/8" barbs on the waterblock fixed; or can they be unscrewed and replaced with 1/2" ones?noeldillabough - Monday, March 25, 2013 - link
I'm actually interested in this question too; can we unscrew them and put in G1/4" fittings?DarkStryke - Monday, March 25, 2013 - link
The're fixed, sadly.Razorbak86 - Monday, March 25, 2013 - link
I have an MVF board with two rads and 3/8"x5/8" tubing throughout in a mid-tower case (Corsair Obsidian 650D). The 3/8" tubing was easy to route, looks stunning in blood red color, and performs exceptionally well in my system.Although it would have been nice to have G1/4" connections instead of barbs, once the tubing is installed, the barbs are barely noticeable, because they are hidden after installation of the tubing. Furthermore, there is very little real-world performance difference (from a thermal efficiency perspective) between 3/8" and 1/2" lines in a water cooling setup. Fractions of a degree, actually. Even with G1/4" connections, I would have still chosen 3/8" tubing throughout my system, simply for the ease of routing in my mid-tower case.
DanNeely - Tuesday, March 26, 2013 - link
Yeah. I bought in for 3/8" 5/8" tubing for ease of routing; but lots of people either decided bigger was better or that the last 0.1C was worth chasing and mixed size tubing looks ugly.noeldillabough - Tuesday, March 26, 2013 - link
I agree the smaller tubing is so very close but I got the larger tubing because it looks badass.EnzoFX - Monday, March 25, 2013 - link
I hate how we've devolved in the number of USB Ports. Moreso when there's wasted I/O space. Let alone when it's filled with legacy connections.DanNeely - Monday, March 25, 2013 - link
What exactly on this one are you blaming as a legacy connector? Unless you're complaining that most PC audio is still done via discrete analog hookups instead of via digital connections, or by turning our monitors into TVs I'm not sure what you're complaining about. If that is what you're complaining about, requiring everyone to either buy a tv receiver to break the audio out of their HDMI or to convince monitor makers (that won't spend an extra dollar for a DP input) to add 5.1 audio out to their monitors is delusional.Until Intel/Amd either put a lot more USB3 into their chipsets or add several extra PCIe lanes to the south bridge mixed USB2/3 is going to be here to stay because you can't get 10 or 12 USB3 ports in without giving something else up?
EnzoFX - Wednesday, March 27, 2013 - link
Did I say this particular board had legacy connections? No. My gripe is with few usb ports, a simple to grasp concept. You're average intel board has 6-8 usb ports, this was when Sandy Bridge came along I believe, and then we had DVI/VGA ports on there too, when there's already HDMI on board, or when an adapter could be used. With P55 we had 10USB ports on your most common average/budget board, and that's just on the back. This oh so premium board only has 8.Moricon - Wednesday, March 27, 2013 - link
The bard has 14 USB Ports 2/3, who needs 14 on the back, I want as many coming to the front as possible.